

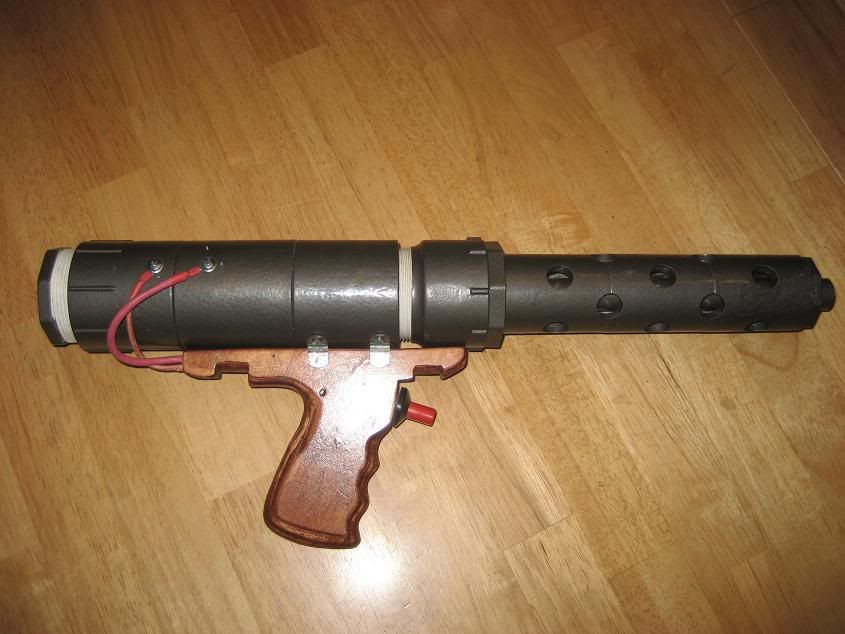
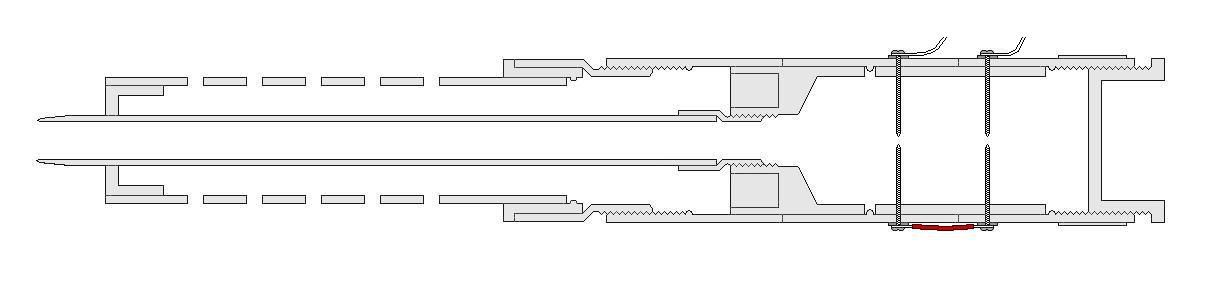
The chamber is 2" x ~6" and the barrel is 1/2" SDR 13.5 x 16" long. I've been using a ton of the 1/2" SDR 13.5 pipe lately because I have a bunch in the basement that I found when I moved here. It's perfect for paintballs. No wadding or sabots needed.
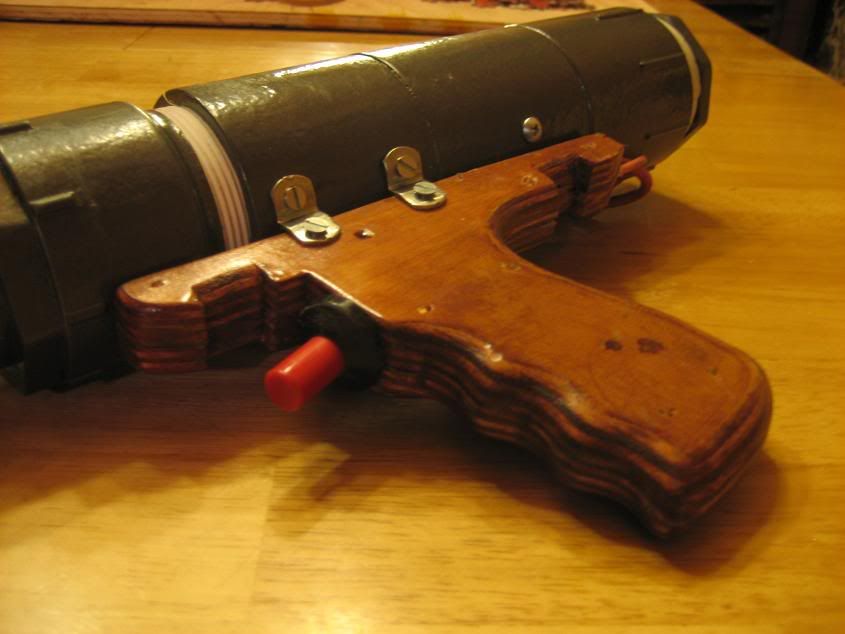
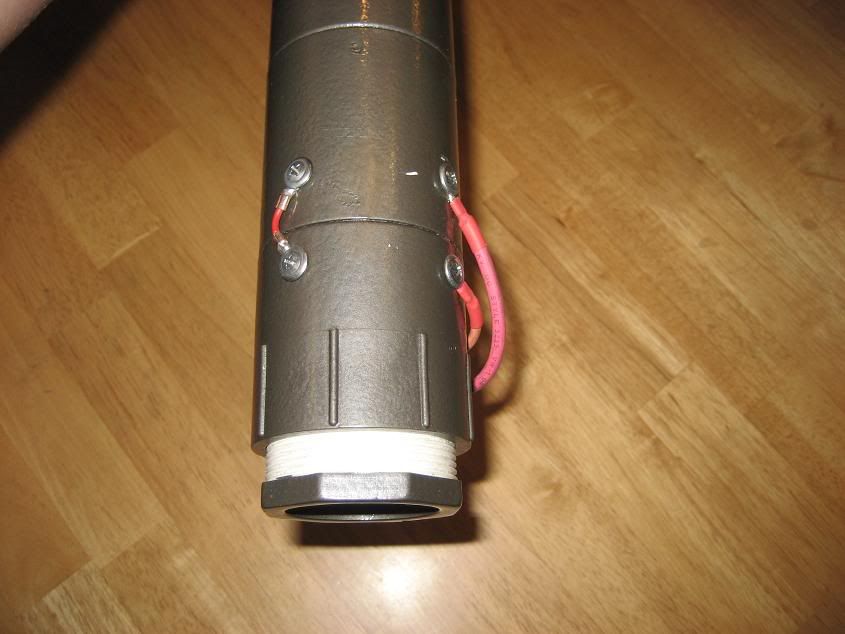
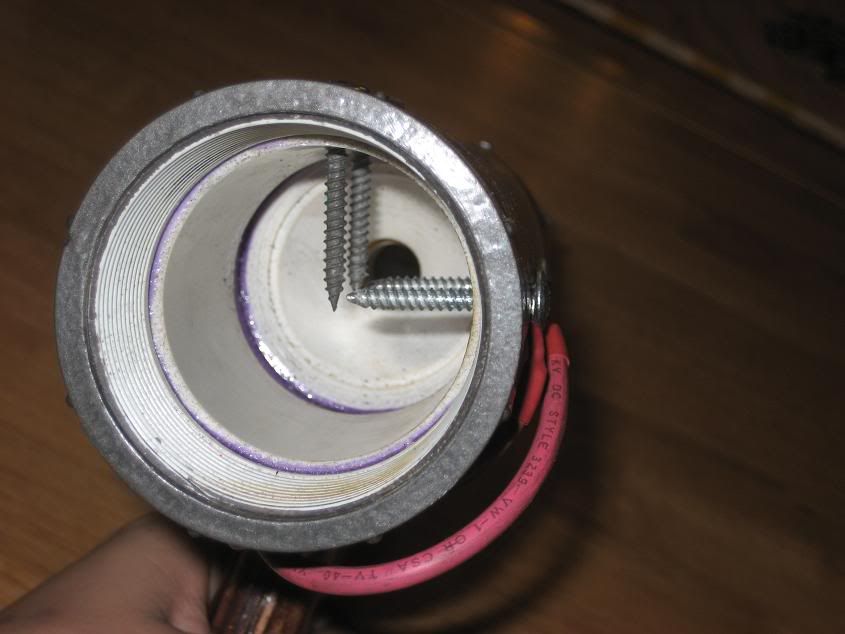
Ignition comes from a standard piezo BBQ ignitor, which is mounted in the pistol grip and there are two spark gaps in the chamber.
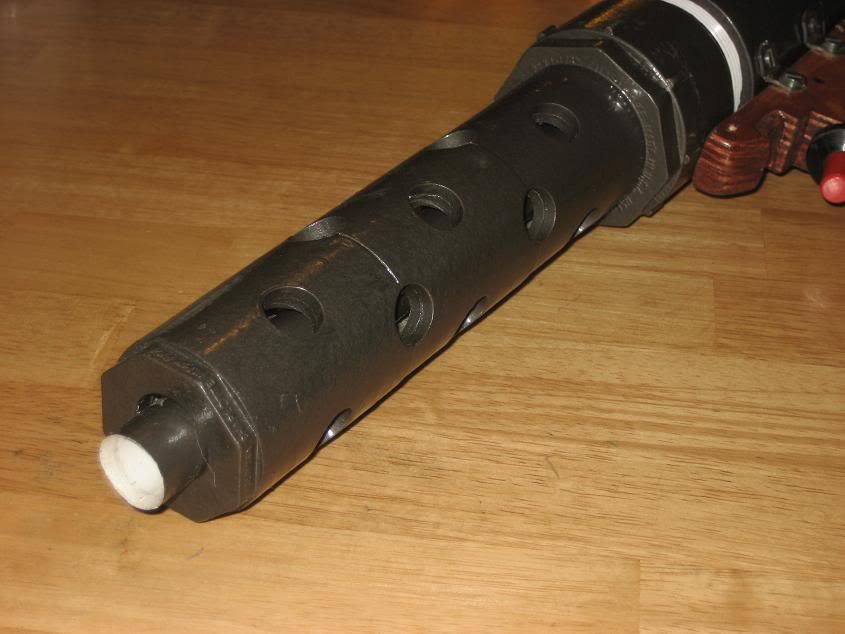
The barrel shroud thingy (pardon the terminology) is simply there to make it look cool. It doesn't really have any other function.
Basically, all I had left to do today was screw on those little metal brackets that hold the handle to the chamber. You can see that the handle was made originally to be held on with hose clamps, but I changed my mind because they didn't look good on the gun.
Anyways... Here are the pictures
<a href="http://i119.photobucket.com/albums/o139 ... .jpg"><img src="http://i119.photobucket.com/albums/o139 ... view-1.jpg" height="170"></a> <a href="http://i119.photobucket.com/albums/o139 ... .jpg"><img src="http://i119.photobucket.com/albums/o139 ... Detail.jpg" height="170"></a>
<a href="http://i119.photobucket.com/albums/o139 ... .jpg"><img src="http://i119.photobucket.com/albums/o139 ... hamber.jpg" height="170"></a> <a href="http://i119.photobucket.com/albums/o139 ... .jpg"><img src="http://i119.photobucket.com/albums/o139 ... rkGaps.jpg" height="170"></a>
<a href="http://i119.photobucket.com/albums/o139 ... .jpg"><img src="http://i119.photobucket.com/albums/o139 ... Shroud.jpg" height="170"></a>
Below are two diagrams, to better explain how it was made. They look a little funky, but it's just from being compressed into a thumbnail. Click on them for clearer image. Note that the chamber looks bigger from the outside of the gun than it actually is. (The diagrams were made as close to scale as possible without spending hours in MS Paint, however they aren't scaled exactly.)
<a href="http://i119.photobucket.com/albums/o139 ... .jpg"><img src="http://i119.photobucket.com/albums/o139 ... annon2.jpg" height="170"></a>
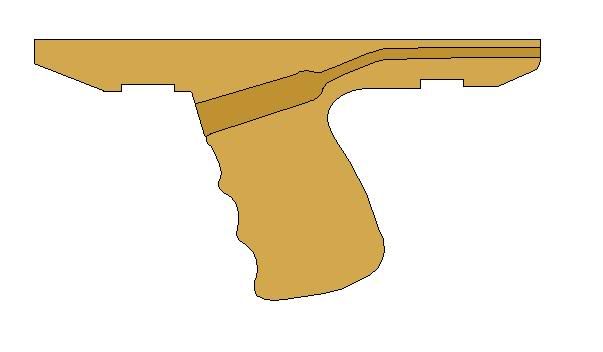
The next diagram is showing where I removed material from the handle to accommodate the BBQ ignitor and wires. Any excess space around the ignitor was filled with hot glue to keep it from wiggling around inside the handle.
<a href="http://i119.photobucket.com/albums/o139 ... .jpg"><img src="http://i119.photobucket.com/albums/o139 ... iagram.jpg" height="170"></a>


