homemade 12 gram co2 adaptor

A place for general potato gun questions and discussions.
User avatar
marpat
Private 4
Private 4
Posts: 75
Joined: Thu Jun 05, 2008 9:31 pm

Wed Aug 20, 2008 3:04 pm

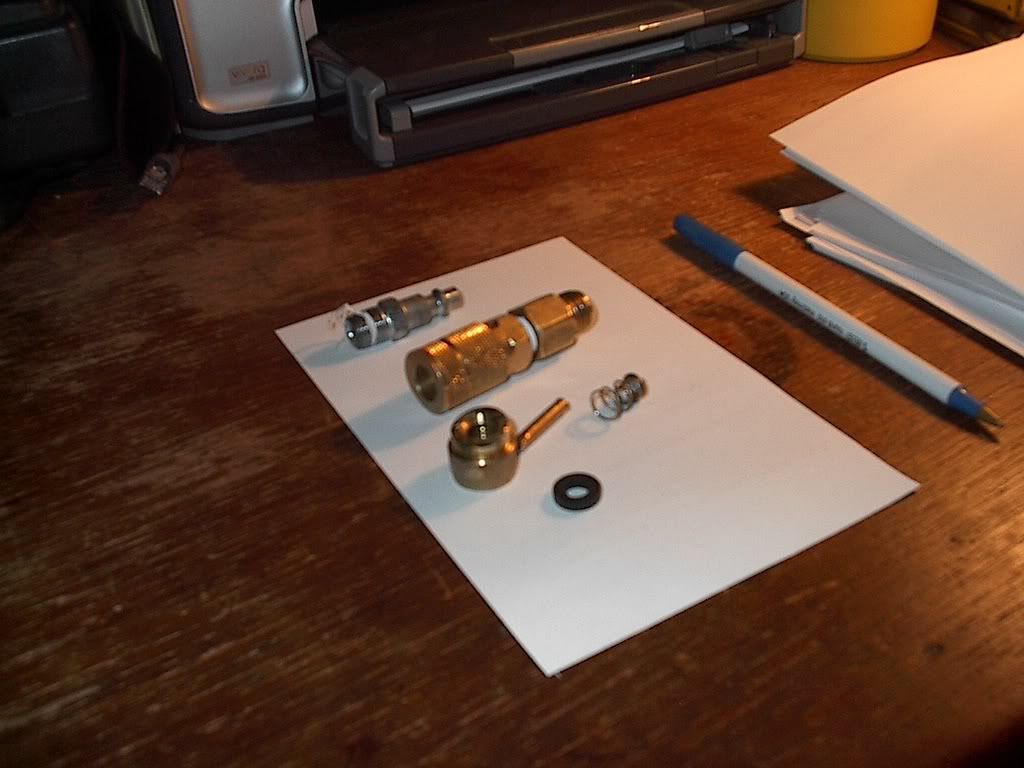
so i took apart a quick connect because i was bored
to start i sliced off the steel retaining ring with a dremel
once that was sliced off and removed
the slide collar came right off revaling the 3 steel balls and the spring

then i put the rest of the quick connect in my vise and started wrenching on it dont worry about damaging the end were the slide collar came from

when the other end finally opened from me wrenching on it a spring a piston and o-ring came out the piston was pointed on one side and cylindrical with holes drilled in it on the other side

i reversed the piston so the sharp side pointed toward the end were u put the male connect

then i put the assembly in the vice and cut off the majority of the side that had the slide collar i did this because the neck on the co2 powerlet wasnt long enough th reach the o -ring and the pointy end of the piston

then i cut a length of brass rod from an old lantern sparker so as not allow the piston to travel to far back wards

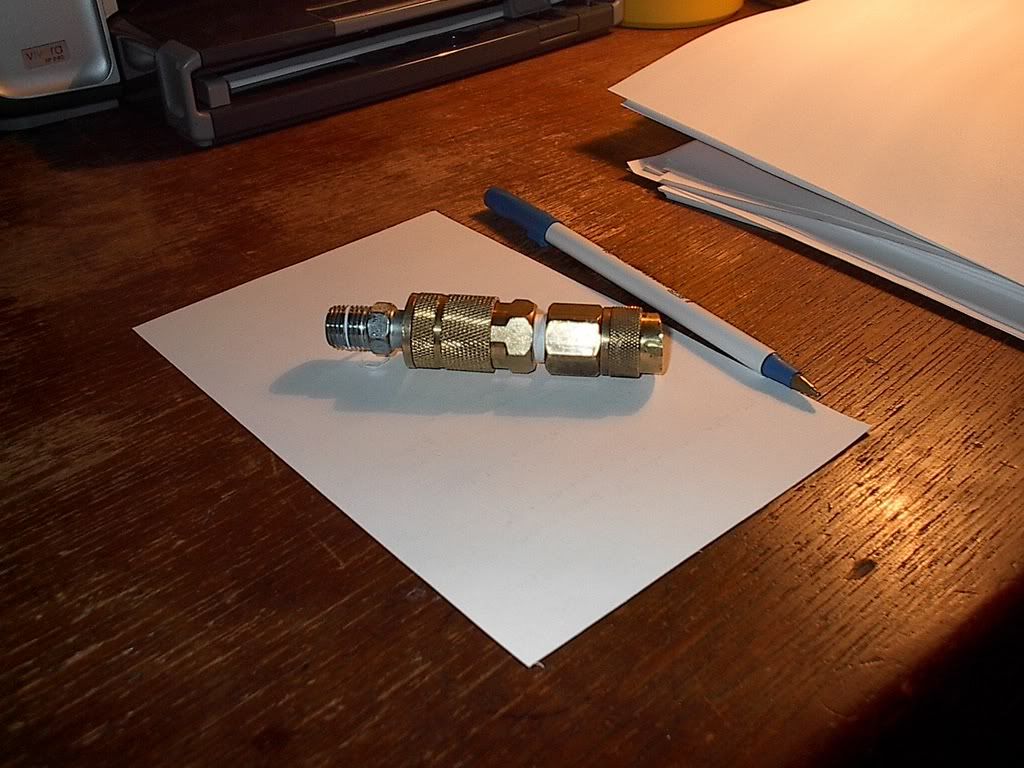
i screwed a male female quick conect into the female 2x quick connect

then i put a male quick connect into the female one that was still stock

finished product
Image


all the components needed

Image


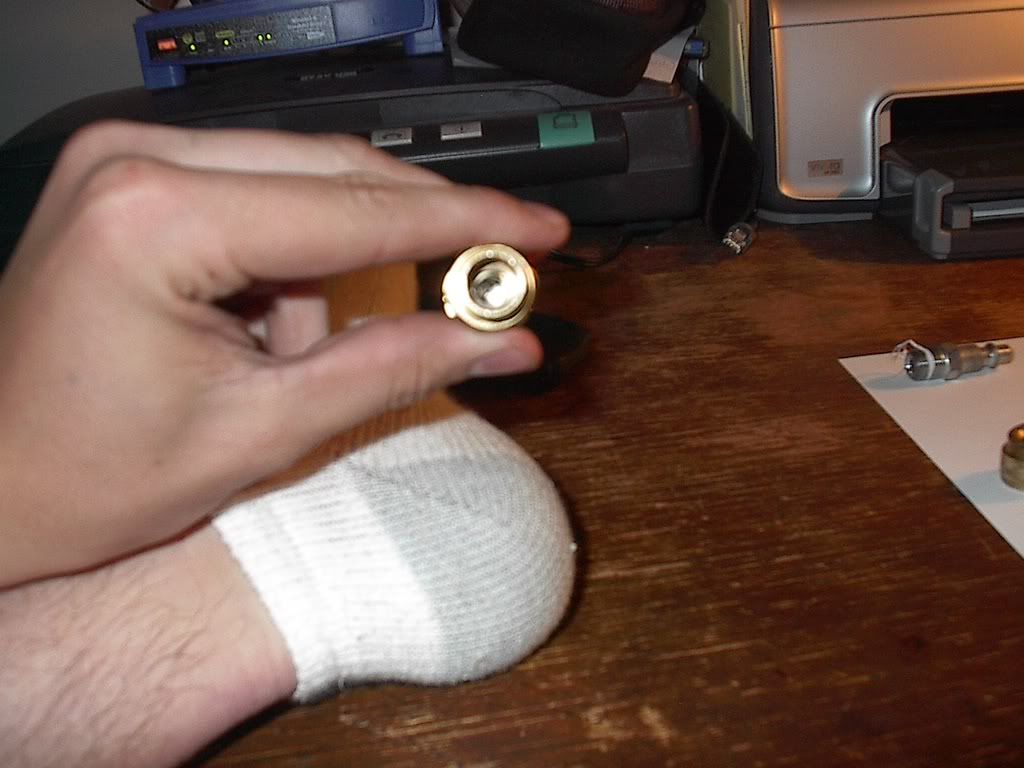
looking in {note spring, piston and rod removed}
Image


the internals

Image


i pressured tested the setup and it is good
the male quick connect can be threaded into the spudgun
u can then take the adaptor off and transfere it from spudgun to spudgun
User avatar
SpudFarm
First Sergeant 3
First Sergeant 3
Posts: 2571
Joined: Sat Nov 04, 2006 9:39 am
Location: Norway Trondheim area

Donating Members

Wed Aug 20, 2008 3:09 pm

that is really smart!!

i bet this is something that everyone uses in a few months :)

congratts on a job well done ;)

BTW nice foot :D
"Made in France"
- A spud gun insurance.
User avatar
marpat
Private 4
Private 4
Posts: 75
Joined: Thu Jun 05, 2008 9:31 pm

Wed Aug 20, 2008 3:18 pm

its not done yet though im still fine tuning the design and i have NOT tested it with co2 yet though its been pressurized i have high confidence in it working

thans for the compliment spudfarm
User avatar
mister pointy
Private 2
Private 2
Posts: 38
Joined: Thu Jun 19, 2008 8:37 pm

Wed Aug 20, 2008 3:28 pm

So you haven't tested it with co2? What pressure did you test it at? and what pressure does it regulate to? Can you adjust it?

You did a good job but i'd like to know a little more about what it can do.
User avatar
marpat
Private 4
Private 4
Posts: 75
Joined: Thu Jun 05, 2008 9:31 pm

Wed Aug 20, 2008 3:40 pm

i pressure tested it at 160 psi

it is non adjustable unfortunaley
so the co2 is unregged :twisted: :twisted: :twisted: :twisted:
User avatar
ALIHISGREAT
Staff Sergeant 3
Staff Sergeant 3
Posts: 1778
Joined: Sat Aug 25, 2007 6:47 pm
Location: UK

Wed Aug 20, 2008 5:19 pm

my family cycle quite alot, so we have these little puncture repair kits that come with a 12 gram inside for inflating the tyre so i just took the adapter from that.... sounds easier than your adapter :shock:
User avatar
Eddbot
Specialist 4
Specialist 4
Posts: 434
Joined: Tue Oct 09, 2007 6:08 pm

Wed Aug 20, 2008 5:48 pm

yeah, but in bike stores, those adapters are $20+
i would much rather make one that didn't cost so much...
:edfirst:
User avatar
JDP12
Staff Sergeant 5
Staff Sergeant 5
Posts: 1943
Joined: Fri Mar 30, 2007 8:34 pm

Wed Aug 20, 2008 7:38 pm

i definitely like it, but am unclear on some aspects- perhaps you could write up a step by step tutorial?
User avatar
marpat
Private 4
Private 4
Posts: 75
Joined: Thu Jun 05, 2008 9:31 pm

Wed Aug 20, 2008 8:12 pm

ok so this only cost me $4.49 in materials plus tax so it is roughly 25 percent the cost of the tire inflator thingy

as far as step by step

materials

male quick connect
basic female quick connect
female quick connect with male threads

tools
dremel w/ cutting wheel
vise

step by step

1 put in vice
2 cut off retaing mechanism on female quick connect on sme its just a steel ring others theres a whole ledge of brass that needs to be taken off
3 take off slide collar, spring, and steel ball
4 put the side were the slide collar was in vice
5 wrench off bottom nut
6 remove internals
7 cut off top so that just the bottom half is left
8 cut length of rod to prevent piston from traveling back too far {note this is a specific length based on the make and model of your quick connects}
9 remove piston and reverse its direction so pointy side face end u cut off
10 refit internals
11 apply teflon tape to female quick connect with male threads
12 screw together
13 put male quick connect in

ready to go

note it is quite important that you suze the brass rod with the male quick connect in place
Hawkeye
Specialist 4
Specialist 4
Posts: 462
Joined: Sun Jan 21, 2007 7:12 pm

Mon Aug 25, 2008 7:25 pm

You should probably be told that the retainer actually unscrews.
metalmeltr
Specialist 4
Specialist 4
Posts: 426
Joined: Thu Dec 18, 2008 3:42 pm
Location: united states

Tue Nov 03, 2009 2:01 pm

could you post a pic with the 12 gram cylinder in place? I am confused as to where it attaches
User avatar
CpTn_lAw
Corporal 5
Corporal 5
Posts: 987
Joined: Sun Sep 11, 2005 9:10 am
Location: France

Tue Nov 03, 2009 3:07 pm

You are aware that unregulated CO2 is about 850 psi of pressure? 160 is nothing compared to that. I'd pressurize it under a cushion, a towel, a matress, and some steel walls. (needles to say, i'd be far away...)
"J'mets mes pieds où j'veux, et c'est souvent dans la gueule."
User avatar
Mr.Sandman
Corporal 3
Corporal 3
Posts: 762
Joined: Fri Mar 28, 2008 9:10 am
Contact:

Donating Members

Tue Nov 03, 2009 3:19 pm

I figure this is still relavent, but how does the c02 cartridge attach? do you use threaded ones?
Yeah, it's that important.
Post Reply