36 caliber QEV shotgun/rifle 400 psi Repeater 22 shot mag

Show us your pneumatic spud gun! Discuss pneumatic (compressed gas) powered potato guns and related accessories. Valve types, actuation, pipe, materials, fittings, compressors, safety, gas choices, and more.
mpmrla
Private 2
Private 2
Posts: 21
Joined: Wed Sep 21, 2011 1:28 pm

Sat Oct 29, 2011 5:18 pm

This is my 36 caliber QEV gun. I chose .360 #000 buckshot for the ammo.
The Barrel is a 3/8 inch hydraulic brake seamless ss tube shrouded with a pvc pipe and tipped with a muzzle brake. The ss tubing is stiffened by wrapping 3 rubber tape bushings around the barrel to get a nice fit inside the pvc pipe and JB weld is injected through 3 holes drilled in the pvc just behind each bushing. This keeps the tubing from vibrating during the pressure surge thereby increasing accuracy. I also crowned all ends of ss tubing with a bevel cutting bit to remove any burrs to increase accuracy. Oh, incidently do not cut any of your tubing with a pipe cutter. The receiver is a 3/8" compression tee modified to accept a bolt and gravity fed ammo from the magazine through a 3/8" hole in the face of the compression nut on the leg of the Tee. A rare earth magnet holds the carbon steel bolt handle in the closed position. There is also a rare earth magnet on the barrel end of the bolt for holding ball bearings in place.The gun is fitted with a red dot scope for daylight shooting and a laser sight for night time fun. The firing valve is a 3/8" alpha QEV. The trigger is a 1/8" pushbutton valve. The accumulator tank is a 1" diameter by 12" long pipe shrouded with pvc. the plumbing from the A side of the QEV is covered with foam rubber to make a comfortable grip. The pressure supply ball valve has been omited and replaced with a properly sized orifice to allow the gun to auto recharge at a rate slow enough to allow the 1/8" vent valve to trigger the QEV. This also minimizes moving parts, simplifies the gun and makes it easier to fabricate. You can drop this gun in the mud and clean out the barrel bolt and magazine tube by dry firing it with the magazine empty with end cap removed and the bolt in the open position. There are only 2 moving parts exposed to the elements and they both get a quick clean out of dust and sand with each shot. I took a look at using a slide check and adapting a nice comfortable trigger and decided that an internal orifice was a simpler way to go. You can see the only 2 moving parts in my video. The gun weighs a few ounces over 5 lbs. and can easily be held and shot like a pistol. Ok, i quess you can cut 12" off the barrel and 6" off the accumulator tank and voila' a pistolla. By keeping supply pressure on the pilot side of the QEV at all times during firing the safety of the QEV is "way mo betta" I have been researching all the neat parts on palmers pursuit shop to determine where to take it to from here. This gun is more fun to shoot than my .50 caliber QEV gun. I have already shot about 200 rounds through it in 1 week. The ammo is cheap. Just buy 8 lbs packs of reloaders #000 cold swaged buckshot .360" +.001 -.000. I am now shooting it with 400 psi regulated CO2 and it will drill through 3/4" yellow pine at 10 yards. The gun can be viewed on my youtube channel at:

http://www.youtube.com/user/mpmrla?feature=mhee


Image
Image
Image
Image
Image
Image
Image
Image
Last edited by mpmrla on Mon Nov 07, 2011 10:36 am, edited 20 times in total.
User avatar
POLAND_SPUD
Captain
Captain
Posts: 5402
Joined: Sat Oct 13, 2007 4:43 pm
Been thanked: 1 time

Sat Oct 29, 2011 7:37 pm

By keeping supply pressure on the pilot side of the QEV at all times during firing the safety of the QEV is "way mo betta" The gun is Co2 tank and high pressure stabilizer ready. The gun can be viewed on
my youtube channel at:
if you had a 3 way valve you wouldn't need that... find slide-check valves on ebay... that's probably the cheapest 3 way valve you can find and you can get versions rated to 3000 psi

Nice gun, the loading mechanism is great
Children are the future

unless we stop them now
jazzman56
Private 3
Private 3
Posts: 53
Joined: Wed May 11, 2011 4:52 am

Tue Nov 01, 2011 5:06 am

Any chance of details on how the loading mechanism and magazine where made?

Awesome rifle you've got there :)

Thanks jazzman
User avatar
wyz2285
First Sergeant 2
First Sergeant 2
Austria
Posts: 2385
Joined: Sat Mar 06, 2010 7:50 am
Location: Porto, Portugal
Has thanked: 1 time
Been thanked: 3 times
Contact:

Tue Nov 01, 2011 5:43 am

Great stuff, congratulations :)
(and I got confused when reading you text :lol: )
User avatar
pneumaticcannons
Specialist 3
Specialist 3
Posts: 392
Joined: Sat Oct 30, 2010 9:45 am
Location: shite country in asia
Contact:

Tue Nov 01, 2011 11:09 am

nice job on the loading mechanism! could you post some details on that please?
Goats spudz
Specialist 4
Specialist 4
Posts: 458
Joined: Tue Aug 02, 2011 12:31 pm
Contact:

Tue Nov 01, 2011 6:19 pm

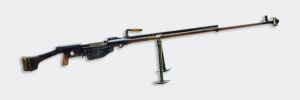
reminds me of the ptrs 41 :D

Image[/img]
mpmrla
Private 2
Private 2
Posts: 21
Joined: Wed Sep 21, 2011 1:28 pm

Wed Nov 02, 2011 6:55 pm

The magazine of this gun is simply a piece of scrap cpvc 1/2" dia by
7-1/4 in long. The cap is a 1/2" copper tube cap. Once the end of the
cpvc tube is capped a 3/8" hole is drilled in the center of one side
all the way through the side of the cpvc. so that when this cap is turned
90 degrees the hole in the cpvc is covered to close the magazine loading
hole. The magazine feed end is butted against a 3/8" hole in the receiver.
the cap is latched in place by a copper coin soldered offset to the top of the cap and as the cap is turned to close the loading hole the coin comes to rest
in a small saw kerf about 1/4" long cut on the side ot the pvc barrel shroud.
mpmrla
Private 2
Private 2
Posts: 21
Joined: Wed Sep 21, 2011 1:28 pm

Wed Nov 02, 2011 7:10 pm

The receiver of this gun was made by taking a 3/8" compression Tee
and inserting a tubing to male npt adapter into the leg of the Tee. Cinch
tha leg compression nut down tight and turn it so that one of the flats is facing the muzzle. Chuck the Tee into a vise and drill a 3/8" hole through that
flat of the compression nut, Tee, ferrule and tubing adapter. So now you have a Tee with four 3/8" holes. That fourth hole is the magazine feed hole. Find a 9mm to 9.2mm rod that will just slide into the leg of the tee to make
your bolt which will also seal that hole through the leg of the Tee.
evanmcorleytv
Specialist 3
Specialist 3
Posts: 350
Joined: Sat Jun 19, 2010 3:44 pm
Location: Tuscaloosa, AL

Wed Nov 02, 2011 9:21 pm

Love it. Sleek looks, sounds like it has great power, and high pressure. GREAT JOB!!
mpmrla
Private 2
Private 2
Posts: 21
Joined: Wed Sep 21, 2011 1:28 pm

Thu Nov 03, 2011 6:03 am

Thanks everyone for the good advice and compliments
Post Reply